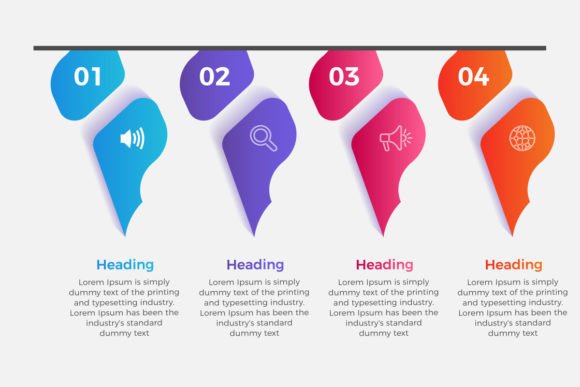
The Arrow Photo Rectangle Infographic: A Visual Tool for Clear Communication
In today’s fast-paced digital landscape, presenting complex information clearly and compellingly is not just an advantage—it’s a necessity. The Arrow Photo Rectangle Infographic template, characterized by its vertical, square layout with six distinct steps, arrow connectors, and dedicated photo spaces, is designed specifically for this purpose. It transforms timelines, progress reports, and milestone showcases into engaging visual stories. For entrepreneurs, marketers, educators, and professionals, this vector-based template offers a powerful shortcut to professional design. However, the ease of access can lead to common pitfalls that undermine its effectiveness. Understanding these mistakes is crucial to leveraging the template to its full potential.
Overlooking the Importance of Narrative Flow
A frequent misconception is treating the six steps as isolated boxes to be filled. The arrows are not merely decorative connectors; they are the narrative backbone. When users simply drop information into each rectangle without considering the progressive story the arrows imply, the result is a disjointed series of points, not a coherent journey. This mistake can severely affect communication, leaving audiences confused about the sequence, causality, or growth being presented.
Practical advice: Before adding any text or photos, define the core story. What begins at Step 1? What is the climax or key achievement at Step 4? How does Step 6 resolve or project forward? Write a one-sentence story for each step that logically leads to the next. This ensures your infographic communicates a clear, forward-moving message, making the arrow design element purposeful rather than ornamental.
Misusing the Photo Rectangle Spaces
The dedicated photo rectangles are a standout feature, but they are often used poorly. Two common errors dominate: using low-resolution, generic stock images that add no real value, or conversely, overloading the space with overly complex photos that distract from the textual data. In the first case, the infographic feels impersonal and unengaging. In the second, the visual clutter competes with the information, reducing overall readability.
A better approach: Treat each photo as a key visual anchor. Select images that are specific and supportive—a genuine product prototype photo for a development milestone, a team photo for a company culture milestone, a clean graph screenshot for a financial goal. Ensure all photos are high-quality and consistent in style (e.g., similar lighting, composition). The template’s high-resolution 300dpi support means your images should match that quality; blurry photos in a sharp vector graphic create a jarring, amateurish effect.
The Pitfall of Default Colors and Text
Because the template offers editable colors and text, it’s tempting to use it “as-is.” This leads to a generic look that fails to stand out or align with your brand identity. Using the default palette and filling the text boxes with long, unformatted paragraphs ignores the template’s core customizability. The result is an infographic that looks like everyone else’s, weakening its impact in marketing or professional presentations.
What to check before using: Always align the template with your visual brand. Use your brand’s primary and secondary colors to modify the shapes and arrows. Edit the text rigorously: employ concise headlines for each step, use bullet points within descriptions where needed, and ensure consistent font sizing. The “editable text, shapes and color” feature is your tool for uniqueness—neglecting it wastes the template’s value.
Choosing the Wrong File Format for Your Needs
The download includes multiple file types (AI, EPS, JPG, SVG), but selecting the wrong one for your project stage is a frequent oversight. Using the JPG for initial editing is impossible, as it’s a rasterized final image. Conversely, trying to use the raw AI or EPS file without compatible vector software (like Adobe Illustrator) leads to frustration. This mistake halts workflow efficiency and can cause quality loss if you force a format into an unsuitable application.
Here’s a simple guideline: Use the AI or EPS files for all editing and customization in professional design software. Use the SVG for web-based projects or when integrating into digital presentations where scalability is key. Use the high-resolution JPG only as a final export for print or static online sharing. Understanding the purpose of each included file prevents technical hurdles and preserves the quality of the 100% vector graphics.
Underestimating the Planning Stage
Many users dive directly into the design software, aiming to create on the fly. This often results in an infographic with inconsistent data density—some steps are overloaded with text, others are sparse—or with milestones that aren’t truly the “biggest” or most significant. The infographic then fails as an effective summary tool, overwhelming or underwhelming the viewer.
Adopt a planning-first methodology. Start outside the template. Gather all your milestones, photos, years, and descriptions. Rank them. Force yourself to select only the six most critical milestones for the six-step structure. Draft the text for each, aiming for parity in information weight. This preparatory step, often overlooked, ensures that when you finally open the vector template, you’re filling it with purpose-driven content, making the editing process swift and the final output balanced and authoritative.
Neglecting Context and Audience Adaptation
The Arrow Photo Rectangle Infographic is versatile, but a single, unadapted version rarely serves all audiences. Using the same infographic for an internal team briefing, a client brochure, and a website banner without adjustment is a common error. The tone, detail level, and visual emphasis should shift. An internal version might include more technical data; a client version might focus on benefits and outcomes; a web version might need simplified text for quicker scanning.
Before finalizing, consider your primary audience. Use the editable features to tailor the piece. For a beginner or consumer audience, simplify descriptions and use more supportive photos. For professionals, ensure data accuracy and use industry terminology. This audience-aware refinement turns a good template into an effective, targeted communication asset.
Ultimately, the Arrow Photo Rectangle Infographic is a superb tool for creating clear, visual narratives of progress and achievement. Its well-organized vector structure provides a professional foundation. By avoiding these common mistakes—by planning your story, customizing conscientiously, selecting the right assets, and tailoring for your audience—you move beyond simply using a template to truly creating with it. This transforms your project from a generic graphic into a compelling, credible, and effective piece of communication that serves your goals and respects your audience’s time and understanding.